
How to make water level indicator with Arduino and Smart phone || Science projects for school and College

 Welcome Warriors!! yes Warriors ,because all worriors don't fight 

  but some SAVE NATURE!!


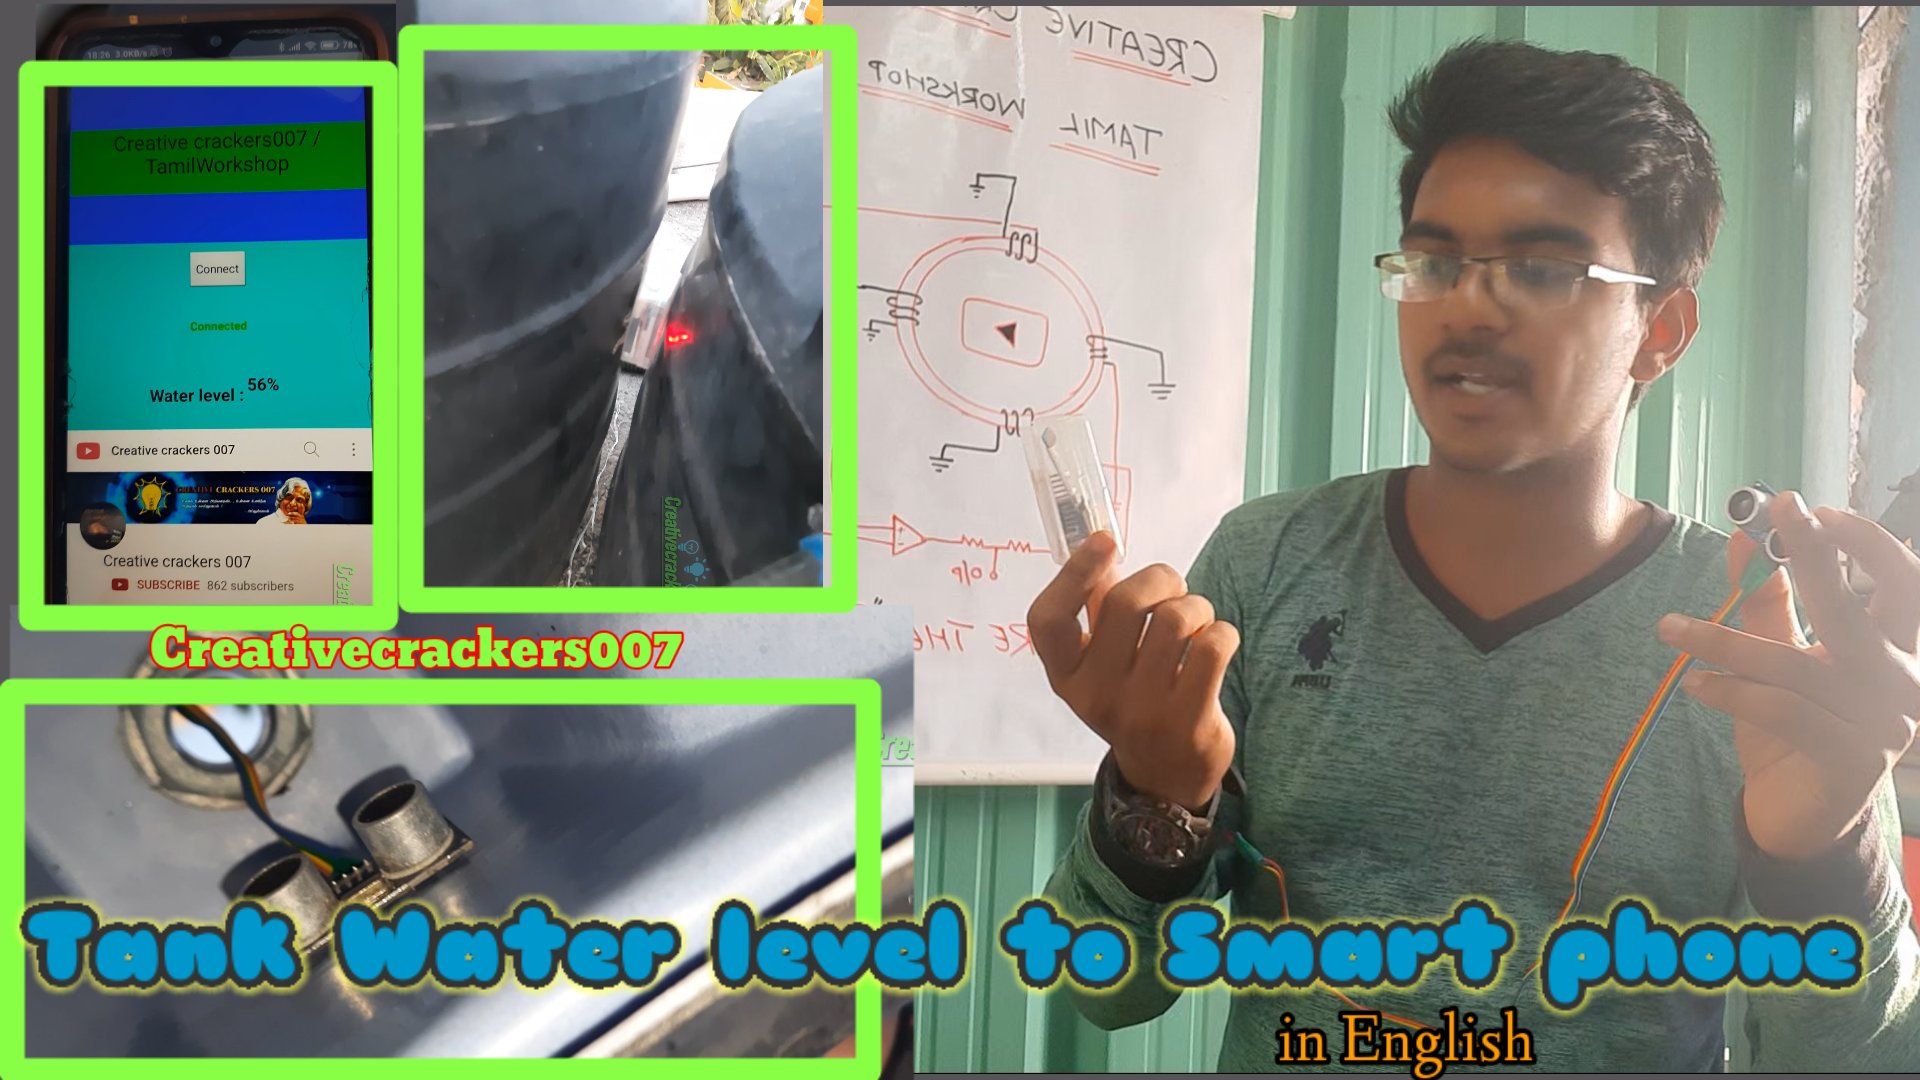
In Today's blog we are going to make a smart water level indicatort save ground water from unnecessary overflow.

Now let's get Started........

Step 1: 

   * First grab all the component required for this project .

    Components Required

    1. Arduino pro mini Click here to buy!

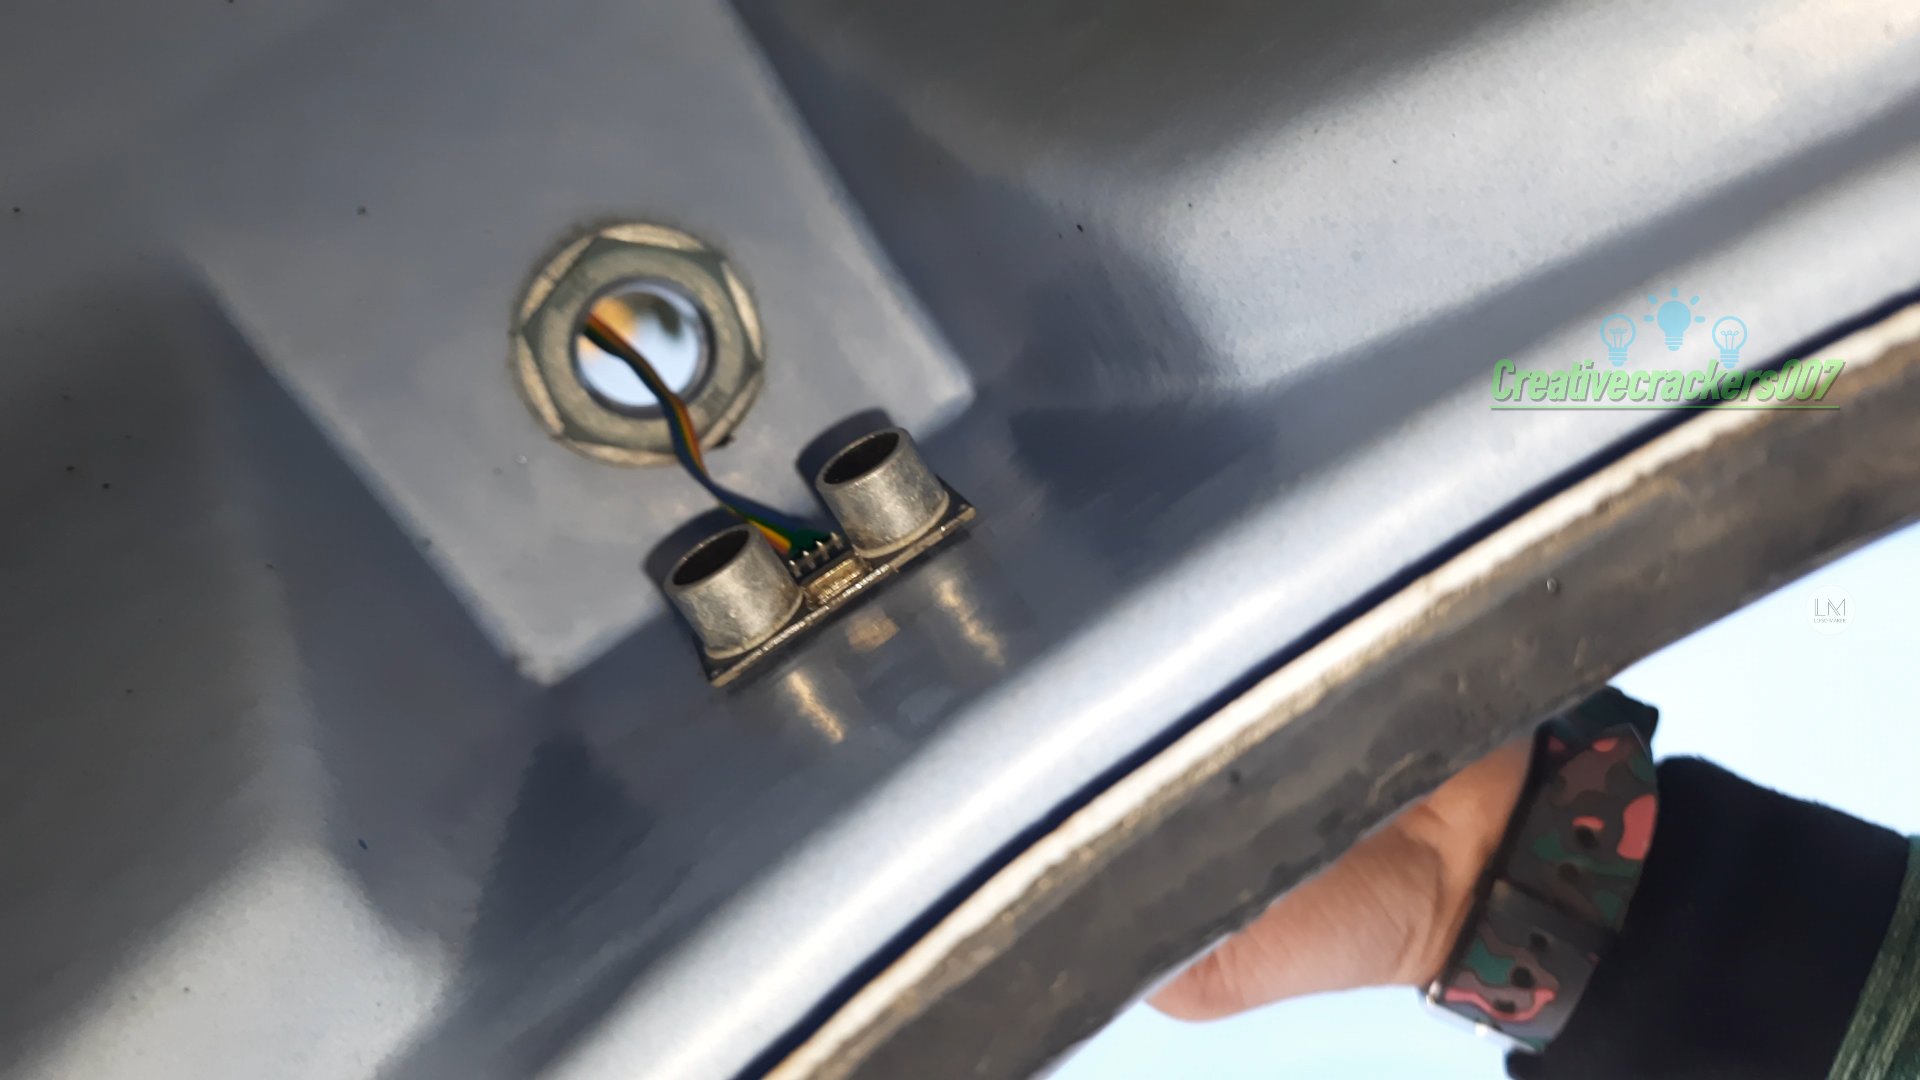
    2. Ultrasonic sensor Click here to buy!

    3. 3.7 volt battery Click here to buy!

    4. Pcb board Click here to buy!

    5. Header pins Click here to buy!


Step 2:


 Connect the ultrasonic sensor and bluetooth with arduino as shown .

 Once its completed now its time to upload the code to our pro mini .Connect the pro mini to arduino for uploading the code with the following diagram


Code for uploading : 


Bluetooth app :


Hurrayyyy!!!!!

Our Water level indicator is ready ..

Place all the components inside a plastic box.

And ultrasonic sensor on the top of the water tank.


Now its working fine.


For better understanding watch this video👇👇


|-------------------------------------------|
|  THANKS FOR WATCHING  |
|___________________________|

{♤♤SUBSCRIBE ♤♤}
           {♡♡IF♡♡}
                   {♧♧You ♧♧}
                             {☆☆LIKE ☆☆}
                                      {○○ it○○}


Comments

Popular posts from this blog

How to make transmitter for drone easily upto 1km range

How to make Transmitter for drone. Step by step  Drones are the most fascinating thing nowadays, that's too with lots of features like machine learning, GPS etc.  So isn't it the right time to make one for us ? Welcome to my blog and Let's build our transmitter for this drone with nrf24l01 module Step 1:  Grab all the components before starting this project, to help you we have given  the link for all components buy there to support us ;) 1. Nrf24l01 module ×2  Click to Buy ! 2. Atmega328p / Arduino nano×1 Click to buy here!        3. PCB board  ×1   Click here to buy! 4. Joystick module ×2  Click here to buy 5. Led ×1 6. OLED display ×1  Click here buy! 7. Battery ×1  Click here to buy! 8. Soldering iron  Click here to buy ! 9. Header pins  Click here to buy! Step 2:              If all the components are in your table ,then its the perfect time to start the project. Now lets get to know much deeper about each component. 1.Nrf2401 module:                     The nRF24L01+

Robotic arm with coding and physics explanation

Presently, the robotic arms are used in various industrial applications like fixing of parts and assembling of the motherboards etc. which seeks the human power power in large scale but are done easily by these robots with certain range of higher accuracy. DIY Robotic Arm Here, we are going to see how to make a "DIY Robotic Arm",  which is the miniature size of the industrial robotic arm in a completely working state along with the coding written in  Arduino software. Few months back I was trying a simple robotic arm. But practically working is not posible.It's effeciency is only 53% Now we are going to see a fully completed Robotic arm with 17 stepper motor Come!! let's see how the robotic arm is working Buy the components at better price from here👇👇 1. Arduino nano-   Clicl here to buy ! 2. a4988 motor drive -  Click here to buy! 3. mini stepper motor  Click here to buy! 4. 12v power supply -  Click here to buy! 5. Servo motor  Click here to buy! 6. Bluetoot